Serratus Anterior
FASCIA RELIEF
BENEFITS:
Helps relieve strain from rhomboids, can eliminate deep shoulder pain, improves shoulder position and posture, may improve inspiration, can improve overhead and front rack positioning.


The fascia (interconnected web) that surrounds the serratus anterior can begin to draw forward. By sliding it back to its functional position, you can dramatically change your shoulder and upper back for the better. This result is less tension, less pain, and better posture.
The serratus anterior naturally pulls your shoulder blade down and out to the side. Your rhomboids do the opposite. When working together, this is perfect for shoulder balance and stability.
When the serrates anterior becomes dysfunctional, it will pull the shoulder blade farther down and towards the outside of your ribcage. This encourages a more rounded posture and creates a chronic strain on the rhomboids that is generally only felt in the rhomboids.
To test this, ask yourself: Do you have chronic tension in your rhomboids? Has previous mobility techniques been unsuccessful? When you pull your shoulders down, do you experience a nagging sensation deep within one or both?
If you’ve answered yes to one or more of these questions, then let’s bring a superior relief to your rhomboids and shoulders by drawing back the serratus anterior fascia.
We have three different methods to work this fascia back towards its functional position:
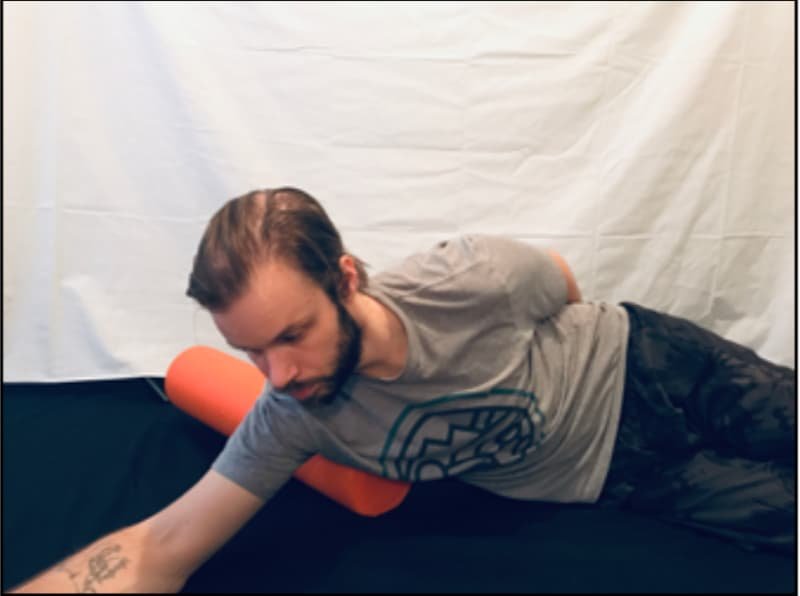
The first is with a foam roller. Lay on your back, placing the roller along your mid-back. Start with the roller evenly touching the bottom corners of your shoulders blades. From here, lightly roll your body on to the side needing relief, towards the outermost side of your ribcage. Then, lift your body off the roller and then rest back down on it. (The reason for this being, by rolling onto this area, you were pushing your fascia forward, towards the front of your body. We want to start with a neutral drag and push it back towards your rhomboids, relieving you from its strain.)
You still want to be situated near the end of the roller, and there is a reason for this, as well. To reiterate, you should be on the side of your rib cage, under your shoulder, on the side of your roller.
Allow your rib cage to sink into the roller for about a full minute before you begin the intention of sliding off the end of it. You will want to allow your rib cage to slide, while simultaneously, leaving your skin behind. As your body begins to slide off the side of the foam roller, the other end will begin to lift up behind you. This roller imbalance provides you with a very slow slide. Now, wait for gravity and your body to do the work.
Your skin will stretch at first— to a stop. Now, patiently wait for your body to slough off from it. This technique will not be effective if it is forced! Once you begin to slough off the roller (simultaneously), begin to gently contract your shoulder blades together. Finally, dropping off your roller completes this technique.
After you’ve fallen fully off the roller, shake out your shoulders, and recheck your back for noticeable differences. If your shoulder sits significantly farther back from the other side after the technique, then go ahead and complete this one again on your other side.
The second version is with the Orb. Place your Orb right under the outside of your lower pec (where a gun holster would sit). Use your working hand’s fingertips for dexterity and balance. Use your non-working side’s hand for stability and/or control of the Orb. Sink moderately into the Orb and (with gravity doing all the work) allow your body to slide off from it. Contract your rhomboids gently as your body slides off the Orb.
Third, if you don’t have a foam roller or an orb (or it’s not convenient enough), you can use your hand. Place the palm of your hand under the bottom outside corner of your pec. Fingertips pointed upwards and back towards the posterior shoulder.
Let your hand sink into the fascia tissues. Keep it there for a minute before grabbing the elbow with your other hand and gently pulling into your elbow to push the fascia back. Imagine the hand you’re using to drive your fascia back is wholly relaxed and non-responsive. You can’t force fascia to move; you need to wait for the hand/fascia to slide back. As it does, gently squeeze your upper back together to complete the move.
Don’t forget to recheck the tension in your rhomboids after completing any of the three variations. Then go out and tell all of your friends!
Side Note: To better understand the angle: When your hand slides in this direction, you should almost end up getting your thumb stuck in your armpit.
Side Note: Your ability to get your hand to move as far back as possible will be left up to your individual anatomy. If you find yourself struggling with this, head back to using an orb or foam roller.
QUICK REFERENCE:
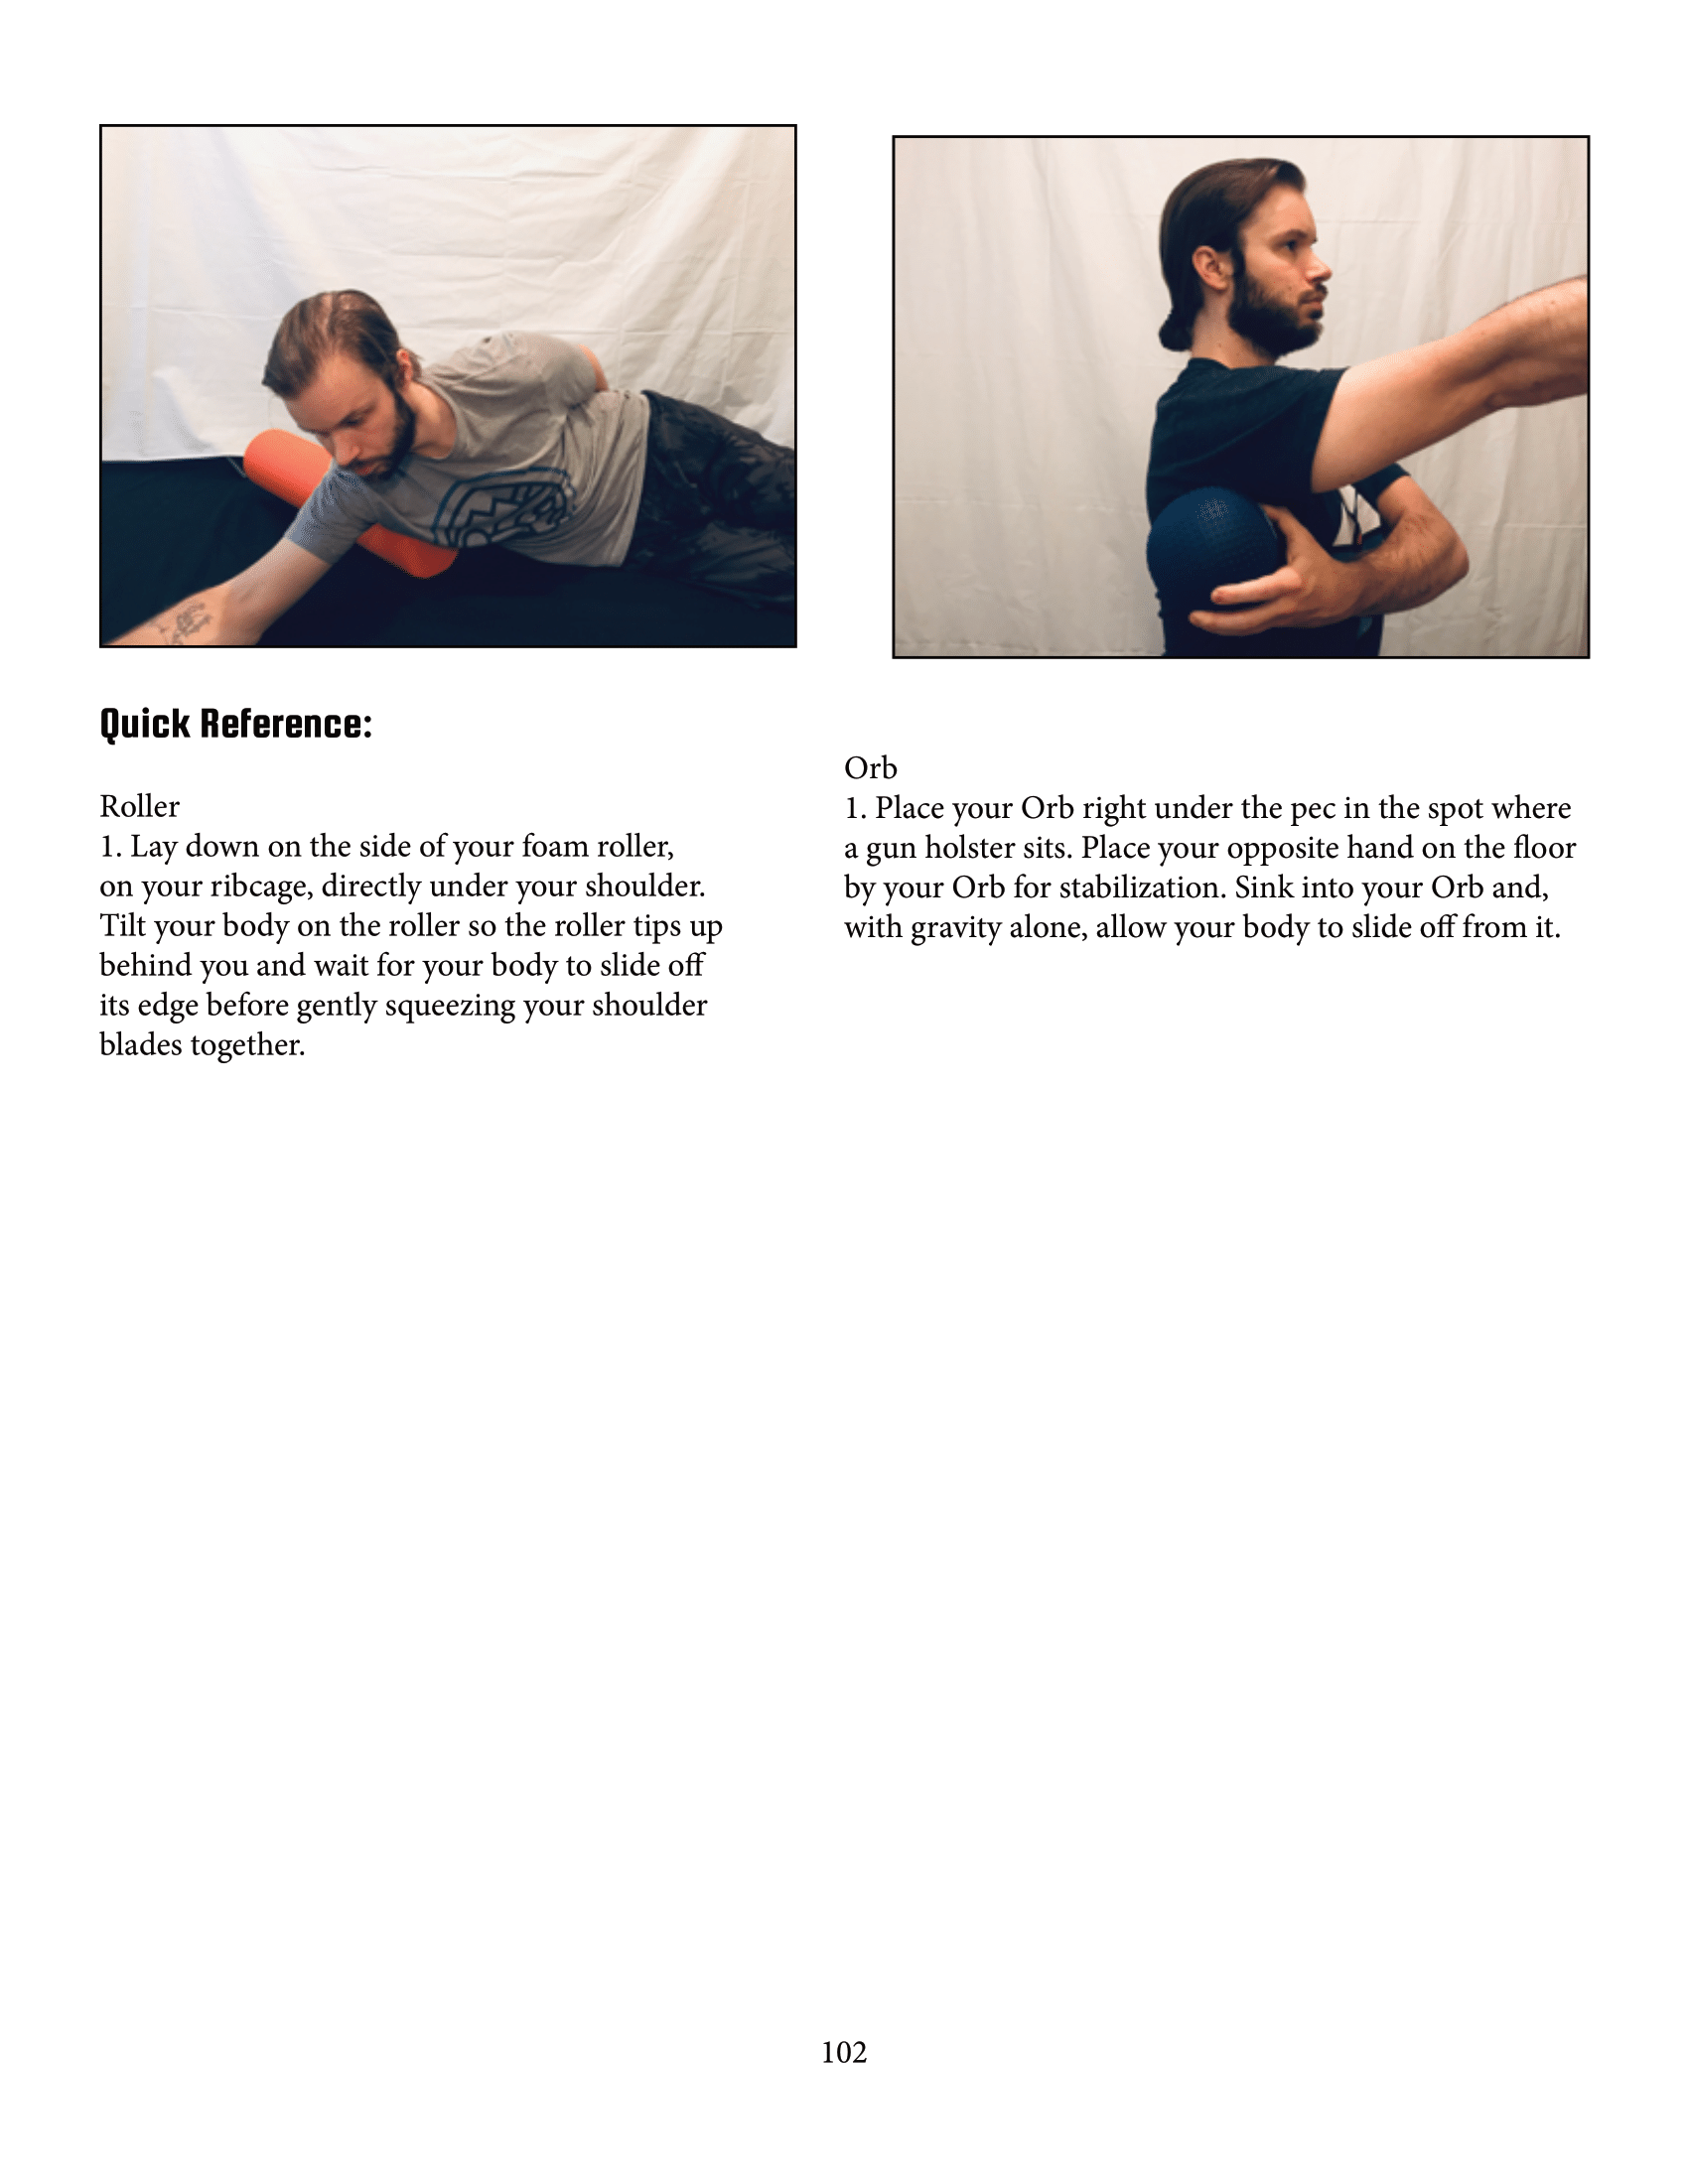
Roller
1. Lay down on the side of your foam roller, on your ribcage, directly under your shoulder. Tilt your body on the roller so the roller tips up behind you and wait for your body to slide off its edge before gently squeezing your shoulder blades together.

Orb
1. Place your Orb right under the pec in the spot where a gun holster sits. Place your opposite hand on the floor by your Orb for stabilization. Sink into your Orb and, with gravity alone, allow your body to slide off from it.

Hand
1. Place the (palm of) your hand under the bottom outside corner of your pec, finger tips pointed up and back, towards the back of your shoulder.

2. Wait a full minute before grabbing your elbow with your other hand and gently pulling pressure into the arm. Wait for your hand to slide your skin (fascia) back without breaking the connection.