
Corkscrew Release
MUSCLE RELIEF
Can eliminate internally rotated arm dysfunction, can reduce or eliminate pronated (rounded) shoulders, can reduce shoulder and elbow pain, can relieve surrounding muscles, can have a significant positive affect on posture.
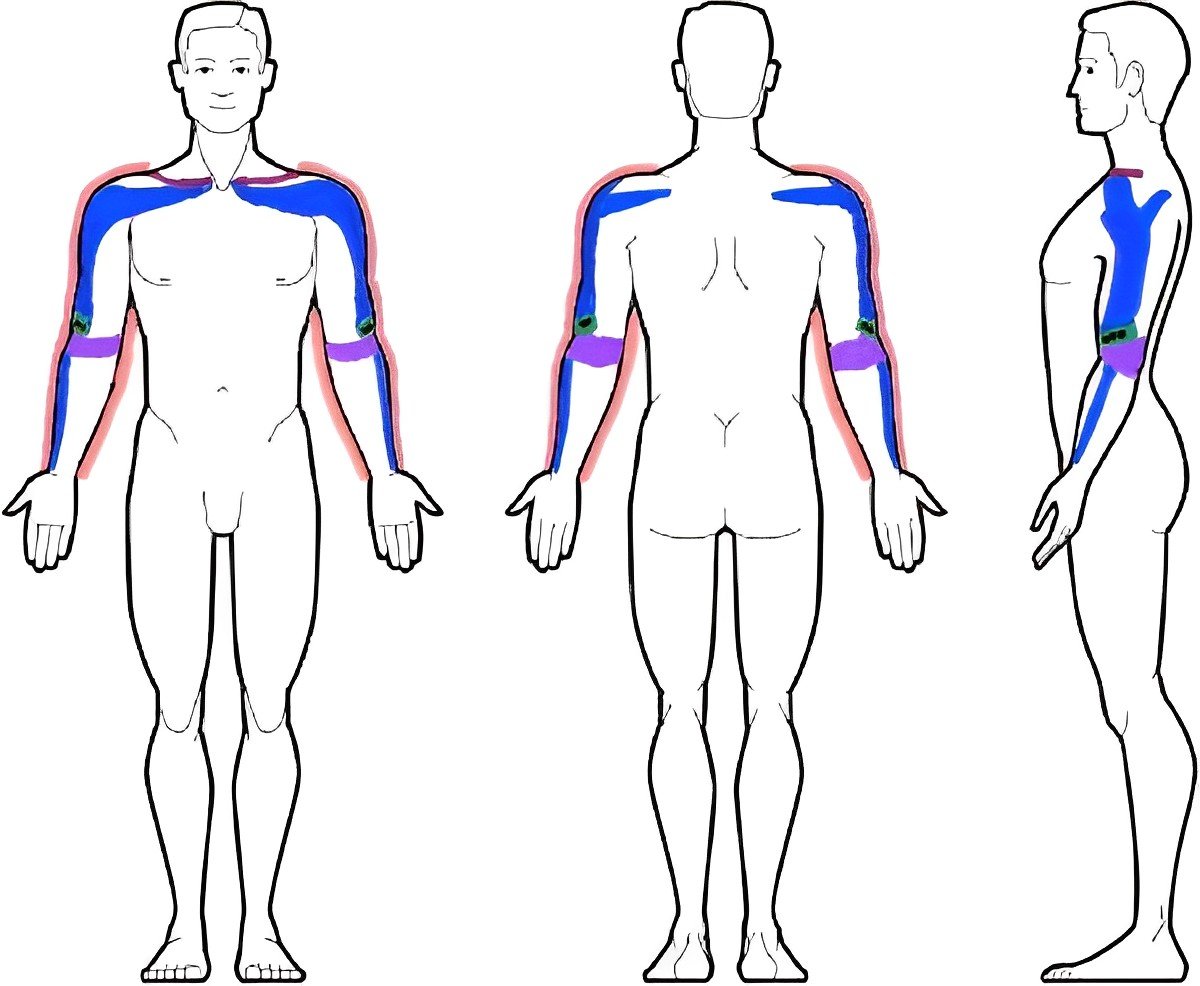

This mobility is my secret weapon for shoulder relief. As you can see from the chart, the release contains a widespread area for potential relief from the mechanical pull (blue) it can create. Furthermore, it should be well outside your area of pain, making it excellent working conditions. If you have long-term pain or tension in a shoulder (or both), I would start here!
Lay down on your back with your arms by your side, palms down. Relax your arms as best you can. Take note of how your arm lays on the flat surface below you. Does it lay straight and flat on the floor, or does it naturally crook at the elbow? If it crooks, then follow along this mobility to straighten out the issue.
With your palm face down, look at your elbow and draw an imaginary line around the circumference. These designated muscles show themselves about a half-inch above this imaginary line and finish their display
of tension about 2-2.5” above the starting space. This carnival-ticket size muscle is actually two muscles: brachialis and brachioradialis.
Feel for it. This bulged muscle over your elbow can look or feel ‘slanted’ and, again, is about the size of a carnival ride ticket. If it appears distinct, then these two muscles have become bound together and have ceased to work independently, as they’re designed to do. (A great way to measure this dysfunction is the test before when you were lying on your back, and your arm did not naturally lay flat but ‘crooked’ out and/or up.)
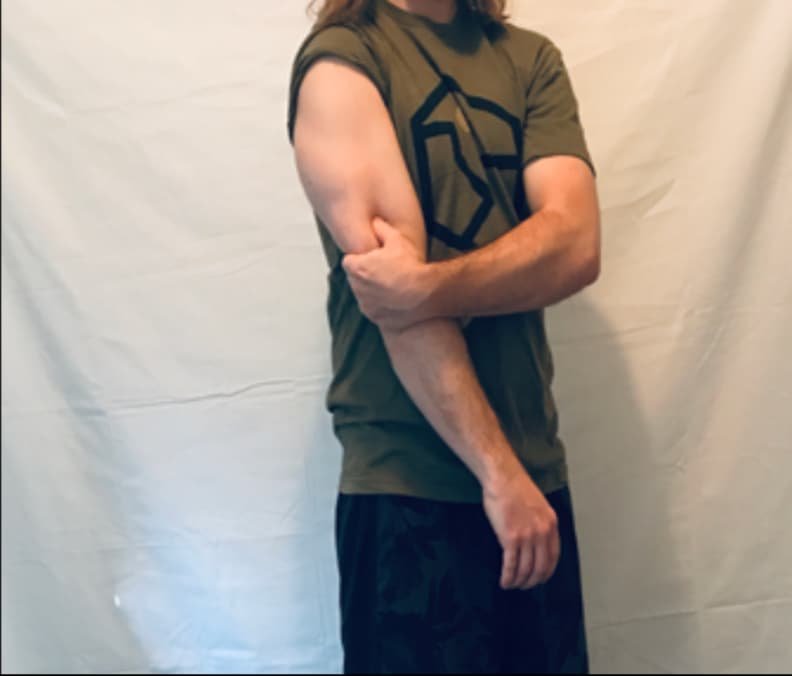
One option is to work on this while standing. Tuck your two arms across your chest. Reach over one elbow, cupping right above it. Press your thumb into the muscle and release the adhesion by opening and closing your elbow. Repeat as necessary. As your thumb will not be large enough, replace your thumb several times as you repeat the motion to break up the full adhesion.
Your second option is to use a foam roller. Lay on your side, on the floor, with your roller. Pin your arm to your ribcage and apply your body weight on top of your arm. This maneuver grants a significant amount of pressure towards the area above your elbow. With your arm tucked to your side, roll your whole body on the roller to affect this dense adhesion.
Before working on the other side, check the difference in length of your two arms by dropping them by your side. If the two arm lengths feel vastly different from each other, continue on the other side for symmetry and balance. After both sides, shake out your arm and do some big arm/shoulder circles afterward.
This technique is more geared towards opening the shoulder than the arm, ironically. But go ahead and recheck your elbow position on the floor. For further help in relaxing your arm towards a neutral state, look into the Ulna Release technique.

QUICK REFERENCE:
1. The dysfunction starts half an inch above your elbow and finishes about 2-2.5” above its starting point. Tuck your arms across your chest, reach over the elbow, cupping right above.
2. Press your thumb into the muscle and release the adhesion by allowing your elbow to open and close.

Option 2: Use a foam roller or orb, laying on your side on the floor, to smash it out.

